
The My Work Queue section allows the auditor or QA reviewer to access and take action on assigned audits. There are two work queues, one for QA and one for the Audit. Audits will appear in these queues according to how they are assigned.
New audits and audits in progress will appear in the 'Audit Work Queue.' You can start or resume an audit by clicking on the provider or coder name that is being audited.
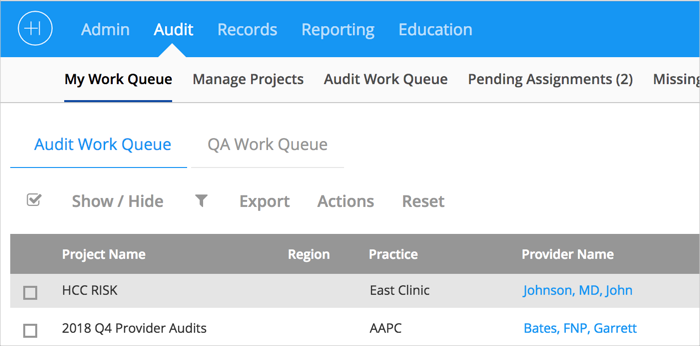
My Work Queue Image 1.
The 'Date of Service Work Queue' will be shown. Click on 'Start Audit' or 'Resume' for the specific date of service to be audited.
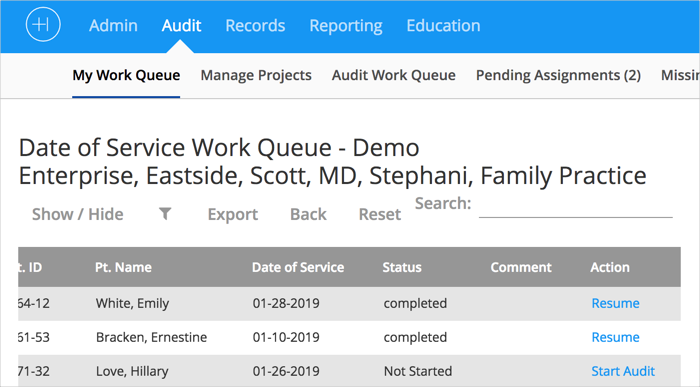 My Work Queue Image 2.
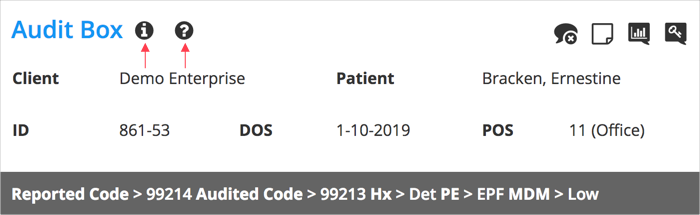
The Audit Box window will open. At the top of the Audit Box you will see an 'Information' button and a 'Question Mark' button.
 My Work Queue Image 3.
The 'Information' button provides tips on navigating the Audit Box.
The 'Question Mark' button provides access to the Audit Guidelines being used for the current audit project.
Completing the Audit Box
Note: You must click 'Save and Close' after completing each section of the Audit Box to successfully save your progress.
Section 1.
The 'Patient Data' section allows you to add the patient information (Name, DOB, Patient ID, POS, and DOS). Here you will also enter the reported diagnosis and E/M/CPT/HCPCS codes, and TOS.
For reports comparing dollar amounts and RVU's select a Payer with a Fee Schedule attached.
Section 2.
The 'History' section is where you enter the different elements documented by the provider. A few commonly used elements would be Chief Complaint (CC), History of Present Illness (HPI), Review of Systems (ROS), Past Medical, Family, and Social History (PHSH).
- Clicking 'Details' allows you to check the individual elements the physician indicated on the medical history portion of the patient’s note.
- 'Quick Clicks' which are the numbers to the right of 'Details' allow you to specify the number of documented elements that were recorded by the physician. The system will automatically calculate the code based off the number of elements selected.
Section 3.
The 'Examination' is where you will choose either 1995 General Exam Guidelines or 1997 Multi System or Specialty Specific Exam. (Select a calculation by MAC Jurisdiction for 1995).
- Clicking 'Details' allows you to check the individual elements the physician indicated on the examination portion of the patient’s note. 'Quick Clicks' are available here as well to automatically calculate the code.
Section 4.
The 'Medical Decision Making' section allows you to:
- Add the number of new or established problems the patient reported in the problem table
- The 'Max' number listed is the maximum number of points a provider can get for problems reported
- Select which data items were reviewed by the provider
- Points are being calculated
- Enter presenting problems and diagnostic procedures or management options to determine the Level Of Risk
Section 5.
The 'Time Based Coding' section allows you to enter in the time spent with the provider.You must answer yes to all three of the required criteria before the time spent field will show up.
Section 6.
The 'Critical Care Services' section allows you to enter the total time of critical care service that were provided.
Section 7.
The 'Procedure' section allows you to complete a documentation checklist in a 'Yes' or 'No' format indicting what was documented. You may also select 'N/A' if it doesn’t apply to that encounter. This section does not do any calculations. It is simply for the tracking of certain procedures done by a provider. If an item is marked 'No,' it will create a chart level comment as determined in audit settings. This section is optional and customizable.
Comments
0 comments
Please sign in to leave a comment.